Play-doh people activity

Today Karolina and I did something very interesting: we created our own play-doh people. This idea I saw on one of my favourite websites where Jelly Play Dough Critters were main characters of the post. You can also read there learning benefits of playing with play doh. But here you can see the result of our work and fantasy...

What we used:
1) play-doh
2) different things from craft sets (googly eyes, foam-glitter flowers, pipe-cleaners, feathers, etc)
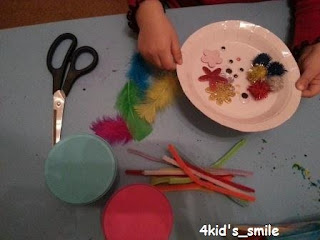
You don't need so much for this activity, the only what is necessary- IMAGINATION!!!and never be scared to make something funny or even silly. For kids it doesn't exist. They like to create and they see much more than we think.

So, we took pieces of play-doh, made various shapes from it: balls, cyllinder, square, triangle (Here I should excuse ourselves if in final picture you will see other shapes, karolina had too much power when stuck in sth to the play-doh body).

Then we added eyes, flowers, feather, pipe cleaners as hair of people - just like we wished.


 And here is our company of strange play-doh people...
We didn't think about their names yet...but may be another time-)))
What was also good is that we trained counting numbers from 1 to 5 with Karolina in this activity:how many feathers or hair has this or that play-doh person.

Try to guess which one was created by me? lol...

Thank you for reading.

Rainbow craft, motoric skills,activity with colours

Today on our way to the nursery Karolina and I saw a huge rainbow. So bright, and so close. At the beginning it was from one side of the car windows, then we turned and it was just opposite us. We were driving towards the rainbow. It impressed Karolina a lot and she remembered how one of her favourite cartoon characters Minnie Mouse was talking about rainbow. Karolina has a book about it as well and the thematic of her 2nd birthday was just about Minnie's rainbow colours (with balloons). So, my little gem was laughing the whole way and speaking sth on her own language as I understood it was kind of her description of it.

All what's happened insipired me today for one craft work with Karolina. We decided to make our rainbow, improving knowledge in colours and motoric skills while working with scissors and scotch band.

I prepared example in advance that she could see what we were going to do. And by that sample I asked her to repeat which colours are in rainbow and to find them from the majority we have.

For this craft we needed:
1) blue card board (for the sky)
2) cotton balls (for clouds)
3) pipe cleaners of different colours
4) scissors, glue, scotch band

First Karolina glued the surface of the cardboard to stick the cotton balls.

Then she chose pipe cleaners of each colour in a correct order, and started to stick them with a scotch band. Here it was the most exciting part for her to cut the band and then to stick it.


After she finished with pipe cleaners, she decided to put additional clouds around... as didn't want to finish the craft-)))
And here is the result of a hard work
Looks a little bit abstract but very cute, I guess. And what do you think???

Thank you for reading:-) Stay with us...


Pinata- How to..- Minnie's Mouse Birthday Party


As I told before to make a pinata is a lot of fun, and joy from creativity process, it is not so difficult to do but it takes lots of time...
So, to make it shorter I will start my post from the...

- MATERIALS, I used to create the Minnie Mouse's Bow Pinata
- Hard cardboard (box from toys, nappies, etc)
- crepe paper
- tape
- scissors
- glue

and THE WAY I DID IT:

1) I drew a shape of bow on the cardboard (2 pcs), cut it out.
2) Then I cut out the stripes from the same cardboard, not so wide, and bond, rubbed them along the edge of the table, in order to make them more pliable. These stripes must be not hard and go well along the main cardboard in the shape of bow.


3) Attaching these stripes, one side at a time, I taped them around the main part. Tip: don't stick tape too close, piece after piece, leave some space, that kids could break pinata without difficulty. Here I did 2 holes and put in kind of key rings that later we could use ribbon to knot it. Then I finished attaching  the other side of pinata with a stripe and left a small hole, which let me fill in pinata with sweets.


4)  I glued the surface of the bow cardboard and covered it with crepe paper (if you have tissue paper of the same colour, it could be a better variant as stamps from glue would be not so visible).  Then i did the same with side of the bow, here put 2 layers. After I covered the entire surface of the bow again with a crepe paper to avoid stamps of glue.

5) Each part was getting drying rather long time, as crepe paper is very thin and absorbs glue easily. Being assured that its dry, i continued with the most interesting for me part...

 6) I was covering the pinata with spiral  of the same crepe paper. Started from the edges, going slowly to the centre of the bow, then I made small "polka dots" from crepe paper of other colour (to make it a little bit more colourful and not monotonous). When one layer is done, I went on with  the next one, overlapping it a little bit.
And here is the result of the work:


There are different variants of how to make pinata, I hope you liked mine and would be glad to read your comments if you do -)))